Showing posts with label Wooden Letters. Show all posts

Tuesday, December 9, 2014

Glittery Xmas Letters


First of all, MERRY CHRISTMAS everyone!!! This year I decided to do some glittery letters for my moms entrance table. It's super easy to make and it looks awesome! Well that's what I think and best of all, my mom agrees with me ;)

Materials: Some wood letters, fine glitter of your choice (optional: you can also add sequins), mod podge, spray can (or you can substitute it with acrylic paint), some sort of wood glue and a foam brush.


Step 1: Spray paint (or use acrylic paint) the back and all sides of your letters. You do not need to paint the front since this is where the glitter will go.


Step 2: Use your foam brush and brush some mid podge onto the front of your letters (the non-painted side). Before the glue dries sprinkle glitter onto the letters. (Make sure you have a paper underneath so you can pick up the glitter that falls off). Continue until have finished all your letters. That should leave you with some very pretty, glittery letters.


Step 3: Since the wood letters I picked were pretty thin and any slight movement will knock them down, I decided to glue them to a base. I got the wood base below at Michaels. I used the same spray can as before and painted the base to match the silver accent of the letters.


Step 4: Use wood glue (for this project I used Loctite super glue) and poured it onto the bottom of the letters. Then carefully place the letter onto the base and put a little bit of pressure and let sit for a couple of minutes. Continue this step until you have glued all your letters onto the base.


And Ta-da! You have some beautiful, glittery letters. Enjoy!


Merry Christmas!!!


Tuesday, November 11, 2014

Upcycle Bottle-Thanksgiving


If you have an old wine or liquor bottle lying around, now is the time to take it out and do something cool with it. You can reuse it and create a nice holiday decoration piece.

Materials: Liquor bottle, burlap, scissors, spray paint, sharpie, glue gun, wood letters, acrylic paint and a foam brush.

Step 1: Remove any labels from your bottle. Clean and dry it. Make sure once it's dried and that there are no water marks.


Step 2: Take your clean bottle outside, set up an area where you can spray paint. (WARNING: When painting make sure you pay special attention to the weather. Make sure there is no wind, even the slightest bit of wind is enough to make spray paint fumes go to places you do not want them to go, for example your car a couple of feet away. Oops).

Step 3: Follow the painting directions on the spray paint bottle. You will have to paint over the bottle several times to achieve the color you desire.


Step 4: Once your bottle is painted, pick the side you want to put the burlap on. (For this bottle, I picked the side that had the engraving on the glass. Once I glue the burlap on, you will not be able to see this).


Step 5: Put the bottle over the burlap and trace out the outline. (Warning: I traced my outline after I had painted it and I accidentally got some sharpie on the bottle so either trace it before you paint it or just be very careful when you trace the outline).


Step 6: Cut out the burlap outline.


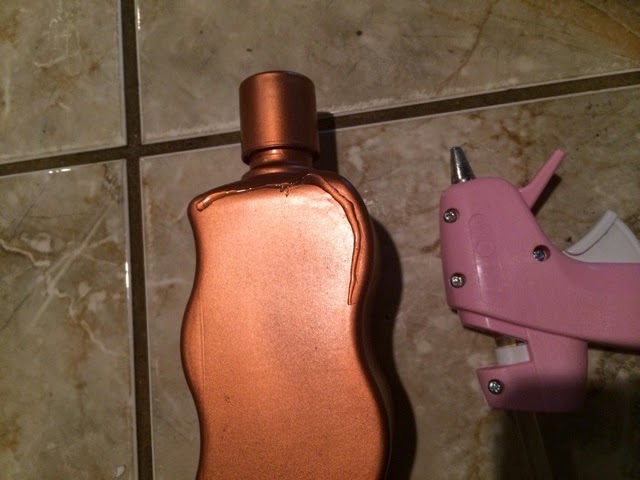
Step 7: Grab your glue gun and start gluing the edges of the bottle and place the burlap on top. Glue a couple of inches at a time so you have the flexibility of moving the burlap around.


Step 8: Once your burlap is glued onto your bottle, grab your wood letters and paint them to your desired color.


Step 9: Once your wood letters are dried, start gluing them on top of the bottle.


Step 10: Let everything set and then decorate any room of the house with your beautiful bottle :) 


Happy Thanksgiving!!! 


Wednesday, January 22, 2014

Decorate Letters for Nursery


These personalized wooden letters are a cute and adorable gift to give to any mother-to-be to hang in the nursery and decorate that room for many years to come. They are super easy to make and will not take too much time :)


Materials: Wooden letters, scrapbook paper, paint, embellishments, scissors, x-acto knife, mod podge, foam brush and a glue gun.

Step 1: Purchase wooden alphabet letters of the baby's name (letters can be purchased at craft stores such as Michaels).
Step 2: Purchase scrapbook paper, paint and any embellishments you want to add to your letters.


Step 3: Paint the inside and outside sides of the letters using a foam brush.


Step 4: Place wooden letter on top of scrapbook paper and using a pencil trace the letter onto the paper. Cut the letter out using either scissors or x-acto knife (whatever you are comfortable using). Place the paper letter on top of the wooden letter and use the x-acto knife to trim any adjustments.


Step 5: Use Mod Podge and cover the back of the letter with a layer the adhesive. 


Step 6: Apply the paper letter to the corresponding wooden block and smooth it out (you can use a ruler or your fingers).
Step 7: You can mod podge the top of the letter to give it some sheen and texture.


Step 8: Let the letter dry and use glue gun to adhere any embellishments  you want to the letters (I used purple flowers to tie in the purple I painted on the sides of the letters).